Concrete Walls to Reference Cinema (Basement Home Theater)

A basement is the single best room in your house for a home theater, and it is not close. Total light control, concrete walls that isolate sound from the rest of the house, and a dedicated space where nobody complains about the volume. But most basement builds get three things catastrophically wrong: they treat acoustic treatment as a finishing touch instead of a structural decision, they plan wiring after the drywall is up, and they pick a screen size that is either too small for the seating distance or too large for the projector's throw ratio.
Get those three things right, and everything else falls into place. Get them wrong, and you end up ripping out drywall six months later.
Before Anything Else: Moisture and Electrical
Basements flood. Basements grow mold. If you skip moisture mitigation, nothing else matters because your $5,000 worth of gear will be sitting in a room that smells like a wet dog.
Start with a dehumidifier rated for your square footage. For most basements under 1,500 sq ft, something in the 50-70 pint range works (the hOmeLabs 4,500 sq ft unit runs around $250 and handles most spaces). If your basement has bare concrete walls, apply a vapor barrier or waterproof membrane before framing. Dricore subfloor panels ($4/sq ft) create an air gap that prevents moisture from wicking up through the concrete slab.
For electrical, plan two dedicated 20-amp circuits minimum: one for your AV gear (receiver, projector, streaming devices) and one for everything else (lighting, dehumidifier, space heater if needed). A single overloaded circuit will trip when your subwoofer hits a bass drop during the opening sequence of Blade Runner 2049. Ask me how I know.
If you are running a projector, get an outlet installed at the ceiling mount location now. Running an extension cord across the ceiling to a projector is the kind of thing that looks "temporary" for three years.
Rob's take
A basement room is the best possible starting point for a home theater for one reason: you have full control over every variable. Light control is easy with no exterior windows or a single window covered. Temperature and humidity are manageable. The concrete slab dampens low-frequency transmission to neighbors. You can treat the walls without worrying about aesthetics in a shared living space. Start with the room; the gear is secondary.
Ceiling Height: The Constraint Nobody Thinks About
Standard basement ceilings run 7 to 8 feet, and that creates two problems. First, Dolby Atmos height speakers need at least a couple feet of vertical separation from your ear-level speakers to create a convincing overhead effect. With a 7-foot ceiling, you are working with inches of margin. In-ceiling Atmos speakers become almost mandatory because there is no room for upfiring modules to bounce sound off a low ceiling effectively.
Second, a dropped ceiling with acoustic tiles eats 4 to 6 inches of headroom. If your basement ceiling is already at 7 feet, a standard drop ceiling puts you at 6.5 feet, which feels claustrophobic. Consider drywall on the ceiling joists instead, or acoustic panels mounted directly to the joists. You keep every inch of height and get better acoustic performance than cheap drop ceiling tiles.
Display: Projector vs TV for Basements
Basements are projector territory. You already have the light control that projectors demand, and most basements have the throw distance for a 100 to 120 inch image. That is 2 to 3 times larger than even the biggest consumer TVs.
For a dedicated theater room with good light control, here is the decision tree:
- Budget ($500-$1,000): The BenQ HT2060 ($700) or Epson Home Cinema 2350 ($900) deliver solid 1080p/4K-enhanced images at 100+ inches. Great for a first build.
- Mid-range ($1,500-$3,000): The Epson LS12000 ($2,500) is the enthusiast sweet spot. Laser light source (no bulb replacements), true 4K with pixel-shifting, and excellent HDR tone mapping.
- High-end ($3,000+): JVC DLA-NZ7 ($5,500) or Sony VPL-XW5000ES ($6,000). Native 4K, deep blacks, cinema-grade color accuracy. This is where projectors start competing with OLED on image quality at 5x the screen size.
If your basement has windows you cannot fully black out, or if your seating distance is under 8 feet, a 75 to 85 inch TV might actually be the better call. The Sony X90L (75", $1,200) or LG C4 (77" OLED, $2,200) will outperform any projector in a room with ambient light. Our projector vs TV comparison breaks down the full trade-offs.
Whatever you choose, use our viewing distance calculator to make sure your screen size matches your seating distance. This is the mistake that costs the most to fix after the fact.
Audio Layout: The Dedicated Room Advantage
Here is where a basement build pulls ahead of every other room in the house. In a living room, you are compromising speaker placement around furniture, doorways, and the fact that your spouse does not want tower speakers blocking the window. In a basement theater, you design the room around ideal speaker positions.
Dolby specifies surround speakers at 110-120 degrees from center, height speakers at 30-55 degrees of elevation, and a subwoofer positioned where room modes are least problematic. In a basement, you can actually hit these angles. Our speaker layout tool lets you plug in your room dimensions and seating position to see exactly where each speaker should go for 5.1, 7.1, or Atmos configurations.
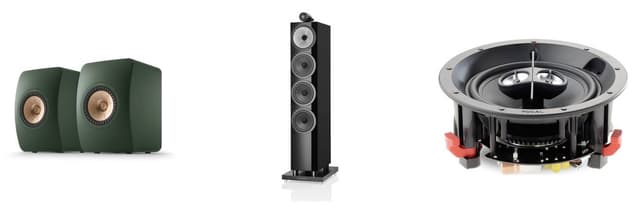
For Atmos specifically, a basement with a standard 8-foot ceiling is ideal for in-ceiling speakers (which outperform upfiring modules in every measurable way). If you are building from an unfinished space, cut the holes and run the wire before the drywall goes up. In-ceiling speakers like the Polk RC80i ($100/pair) or the Micca M-8C ($80/pair) are excellent budget options that disappear into the ceiling. The full setup process is in our Dolby Atmos setup guide.
Acoustic Treatment: The #1 Thing Basements Get Wrong
Parallel walls and hard concrete surfaces make basements acoustically terrible by default. Standing waves between parallel walls create massive bass peaks and nulls. You will have spots in the room where the bass physically shakes the couch and other spots three feet away where the bass almost disappears. This is not a speaker problem or a receiver problem. It is a physics problem.
Bass traps in the corners are the single highest-impact acoustic treatment you can install. Not foam tiles on the walls. Not a fancy diffuser panel behind the seating position. Corner bass traps. Four floor-to-ceiling bass traps (one in each corner) will do more for your sound quality than upgrading your speakers by two tiers.
GIK Acoustics 244 Bass Traps ($65 each) or the ATS Acoustics Corner Bass Traps ($70 each) are the standard recommendations. After corners, add 2-inch absorption panels at the first reflection points (the spots on the side walls where sound bounces from the speakers to your ears). Our acoustic treatment guide covers the full process with placement diagrams.
If you are building from bare studs, you can save money by filling the wall cavities with Rockwool Safe'n'Sound insulation ($1/sq ft) before drywalling. This turns your walls themselves into broadband absorbers and is dramatically cheaper than hanging panels after the fact.
Wiring: Do It Now or Regret It Forever
This section is short because the message is simple: run every wire before the drywall goes up. Every single one.
- Speaker wire: 14-gauge in-wall rated (CL2/CL3) to every speaker location. Include runs for speakers you might add later. A 250ft spool of 14AWG CL2 speaker wire costs $50. Running it through open studs takes minutes. Fishing it through finished walls takes hours and profanity.
- HDMI: Run conduit (1" or larger) rather than bare HDMI cables. HDMI standards change every few years, and pulling a new cable through conduit is trivial. Pulling it through drywall is not.
- Subwoofer cable: Run RG6 coax or a dedicated subwoofer cable to at least two locations (front and rear of the room). Dual subs are increasingly standard, and having the wiring ready means you can add the second sub whenever the budget allows.
- Ethernet: Run Cat6 to your equipment rack. Wi-Fi is fine for browsing, not for 4K streaming to an Apple TV or Shield Pro when your family is also on the network.
Our wiring guide has the full pre-wire checklist with cable recommendations and termination tips.
Budget Tiers: What to Buy at Each Level
$2,000: The Starter Theater
This gets you a legitimate 5.1 system that sounds better than any soundbar at any price. Denon AVR-S670H ($250), five Neumi BS5 bookshelf speakers ($90/pair, so $225 total for LCR + surrounds), Dayton Audio SUB-1200 ($150), BenQ HT2060 projector ($700), and a Silver Ticket 100" fixed-frame screen ($200). That leaves you $425 for cables, speaker wire, and basic acoustic panels.
$5,000: The Serious Build
Denon AVR-X1800H ($450), Emotiva T1+ tower speakers for L/R ($500/pair), Emotiva C1+ center ($250), Emotiva B1+ surrounds ($230/pair), SVS PB-2000 Pro subwoofer ($900), Epson LS12000 projector ($2,500), and a Silver Ticket 120" screen ($250). Add $400 for GIK bass traps and first-reflection panels. This is where the room starts sounding like a real cinema.
$10,000+: Reference Grade
Denon AVR-X3800H ($1,300) or Marantz Cinema 50 ($1,400), KEF R3 Meta bookshelves for L/R ($1,400/pair) or Klipsch RP-8000F II towers ($1,400/pair), matching center and surrounds ($1,000-$1,500), dual SVS PB-3000 subs ($2,200), four in-ceiling Atmos speakers ($400), JVC DLA-NZ7 projector ($5,500) or a 77" LG C4 OLED ($2,200). Budget the remaining for a full acoustic treatment package from GIK ($800-$1,200 for a custom room kit).
For more detailed gear lists with current pricing, check our real-world build cost breakdowns and use the CinemaConfig builder to validate that all your components work together before you buy.
The Build Order That Actually Works
Basement builds fail when people do things out of order. Here is the sequence that avoids the most common rework:
- Moisture mitigation (vapor barrier, dehumidifier, subfloor). Do not skip this.
- Electrical (dedicated circuits, outlet placement for projector/equipment).
- Framing and insulation (Rockwool in wall cavities for acoustic benefit).
- Pre-wire everything (speaker cable, HDMI conduit, subwoofer cable, Ethernet, future runs).
- Drywall and paint (dark colors on the ceiling and front wall reduce light reflections).
- Acoustic treatment (corner bass traps first, then first-reflection panels).
- Equipment and calibration (mount speakers, run receiver auto-EQ, tweak to taste).
Steps 1 through 4 are boring and invisible. Nobody posts them on Reddit. But they are the difference between a basement theater that sounds and performs like a professional installation and one that looks great in photos but has boomy bass, buzzing outlets, and cables running along the baseboards.
The good news: a basement gives you advantages that no other room in your house can match. Light control, sound isolation, and the freedom to design the space around the theater instead of the other way around. Take the time to do it right, and you will have a room that makes every movie feel like an event.
Rob Teller
Founder, CinemaConfig
15 years in consumer hardware and software, mostly on the product side. NZXT (cases and cooling), Asetek (liquid cooling, global sales), a short run advising on Alienware's roadmap at Dell, then four ... More about Rob · Affiliate disclosure